
Introduction to Archcraft and Bcdedit
Welcome to our blogpost “How To Set Up Archcraft With Bcdedit: A Comprehensive Guide”. Are you ready to dive into the world of Archcraft? This lightweight Linux distribution is all about customization and performance, making it a favorite among enthusiasts. But what if you’re running Windows and want to seamlessly set up Archcraft alongside your existing OS? That’s where Bcdedit comes in.
Bcdedit is a powerful command-line tool that lets you manage boot configurations on Windows systems. It allows you to create new entries for different operating systems, which means you can easily switch between them at startup. If you’ve ever wondered how to set up Archcraft with Bcdedit, you’re in the right place! This guide will walk you through everything from system requirements to troubleshooting tips—making your transition smooth and hassle-free. Let’s get started!
Benefits of Setting Up Archcraft with Bcdedit
Setting up Archcraft with Bcdedit opens the door to a customizable and streamlined operating system experience. One significant advantage is enhanced boot management. You gain precise control over your startup options, allowing you to select different kernels or configurations seamlessly.
Another benefit lies in improved resource allocation. By optimizing how Archcraft loads, users can streamline their workflow and enhance overall performance. This means less time waiting for applications to launch and more efficient multitasking.
Furthermore, integrating Bcdedit provides robust troubleshooting capabilities. If issues arise during boot-up, having access to various recovery options can save valuable time and effort.
This setup fosters experimentation. Users are free to tweak their environments without fear of permanent changes affecting productivity negatively. The combination of Archcraft’s lightweight nature with Bcdedit’s flexibility creates an ideal platform for both new users and seasoned enthusiasts alike.
System Requirements and Prerequisites
Before diving into the setup process, it’s crucial to know what your system needs to run Archcraft smoothly. First and foremost, ensure that you have a compatible 64-bit architecture. This is mandatory as Archcraft is tailored for modern systems.
You’ll also need at least 2 GB of RAM. While it can function with less, having more will provide a better experience during multitasking or running resource-heavy applications.
A minimum of 10 GB free disk space is advisable for installation and future updates. Depending on your use cases, consider allocating additional space if you plan to install various applications or store large files.
An internet connection is essential for downloading Archcraft and any necessary updates during the setup process. Make sure all these requirements are met before proceeding with the installation!
How To Set Up Archcraft With Bcdedit: Step-by-Step Guide
Setting up Archcraft with Bcdedit can seem daunting, but breaking it down into manageable steps makes it easier.
First, ensure you have Archcraft installed. You can find the latest version on its official website. Once downloaded, follow the installation instructions carefully to configure your system.
Next, download and install Bcdedit if you haven’t already. This tool is essential for managing boot configurations in Windows.
After that, it’s time to create a new boot entry for Archcraft. Open Command Prompt as an administrator and use specific commands to add the entry seamlessly into your existing boot manager.
Each command needs precision; any mistake could lead to issues later on. Pay close attention during this process to ensure everything is set correctly before rebooting your system.
This step-by-step approach will demystify setting up Archcraft with Bcdedit and help you navigate through potential hurdles more easily.
A. Installing and Configuring Archcraft
Installing Archcraft is an exciting venture that opens doors to a highly customizable desktop experience. Begin by downloading the latest ISO file from the official Archcraft website. Ensure you have a reliable USB drive, as this will become your installation media.
Once you’ve created a bootable USB using software like Rufus or Etcher, reboot your system and enter the BIOS settings. Select your USB drive as the primary boot device. This step is crucial for initiating the installation process.
As you navigate through the installer, follow prompts carefully. You’ll be guided through partitioning options where you can manage disk space according to your needs. Afterward, select desired packages; Archcraft allows users to tailor their installations with various pre-configured environments.
Once everything’s set up and installed, it’s time for configuration adjustments—tweak settings such as themes and keyboard layouts to suit personal preferences right away!
B. Downloading and Installing Bcdedit
To download Bcdedit, you don’t need to search far. It’s actually built into Windows, making it readily accessible without a separate installation process.
Just open the Command Prompt with administrator privileges. You can do this by right-clicking on the Start menu and selecting “Windows Terminal (Admin)” or “Command Prompt (Admin).”
Once you have the terminal up, type `bcdedit` and hit Enter. This command will show you all existing boot entries on your system. If there’s an error message instead of a list of entries, ensure that you’re running as an administrator.
If you’re looking for additional features or interface improvements, consider third-party tools that leverage Bcdedit functionalities but remember they may vary in reliability and support. Always read reviews before proceeding with any downloads from unofficial sources.
C. Creating a New Boot Entry for Archcraft
Creating a new boot entry for Archcraft is an essential step to ensure your system recognizes and loads it properly. First, open Command Prompt with administrative privileges. This allows you to make the necessary changes without any restrictions.
Next, use the `bcdedit` command to create your new boot entry. You’ll need to specify options like the path where Archcraft resides on your disk. A typical command might look something like this:
“`bash
bcdedit /copy {current} /d “Archcraft”
“`
This duplicates your current configuration while naming it “Archcraft.” After running that, you need to set specific parameters for this entry—like pointing it towards the right kernel and initrd files.
Always double-check paths entered in commands; even small typos can lead to issues down the road. Once configured, restart your machine and see if you can select Archcraft from the boot menu!
Troubleshooting Common Issues
When diving into How To Set Up Archcraft With Bcdedit, you might encounter a few bumps along the way. It’s not uncommon for users to face boot errors after setting up their configurations.
If Archcraft doesn’t appear in your boot menu, double-check that the new entry was created correctly. A simple typo can lead to major headaches.
Another frequent issue is system performance lagging post-installation. This could stem from insufficient resources allocated during setup or outdated drivers. Make sure everything is updated and optimized.
For those who experience crashes or freezes, consider reviewing compatibility settings within Bcdedit. Sometimes adjusting these parameters can resolve unexpected behavior.
Don’t overlook community forums and documentation; they are invaluable resources when troubleshooting specific problems related to your unique hardware configuration or software version.
Advanced Tips and Tricks for Using Archcraft with B
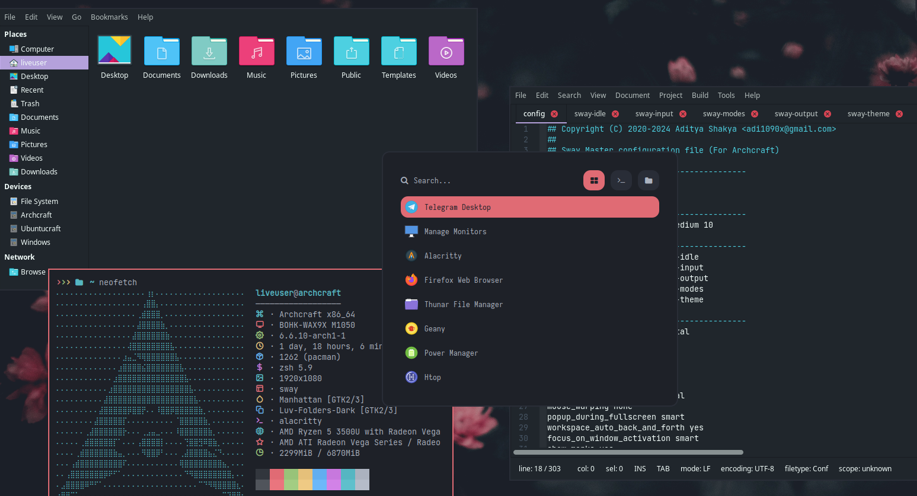
To elevate your Archcraft experience, consider customizing the desktop environment. Use tools like Polybar for a sleek status bar or set up a unique theme to personalize your workspace.
Keyboard shortcuts can drastically enhance productivity. Take time to create custom keybindings that suit your workflow. This small change can lead to significant efficiency gains.
Explore additional package managers such as AUR (Arch User Repository) for even more software options. Dive into community repositories and discover hidden gems tailored for Archcraft users.
Don’t overlook system monitoring tools either. Implement applications like htop or Conky to keep an eye on resource usage without interrupting your workflow.
Engage with the Archcraft community online. Forums and Discord channels are great places to share experiences and gather insights from other users who have optimized their setups in unique ways.
Conclusion
Setting up Archcraft with Bcdedit opens a world of customization and flexibility. With the right steps, you can tailor your operating environment to suit your personal preferences.
The process may seem daunting at first, but breaking it down into manageable parts makes it achievable. Each step provides an opportunity to learn more about both Archcraft and Windows boot management.
Don’t hesitate to explore further once you’re comfortable with the basics. The community around Archcraft is vibrant and full of resources. Engaging in forums or following tutorials can enhance your experience significantly.
Experimentation is key; don’t shy away from trying new configurations or settings that pique your interest. Embrace the journey of setting up and refining your system—it’s all part of the adventure in tech exploration!
Frequently Asked Questions (FAQs)
Frequently Asked Questions (FAQs)
Setting up Archcraft with Bcdedit can raise a few questions. Here are some of the most common inquiries to help you navigate through the process smoothly.
What is Bcdedit, and why do I need it for Archcraft?
Bcdedit is a command-line tool used to manage boot configuration data in Windows. It allows you to create and modify boot entries, which is essential for setting up dual-boot systems with Archcraft.
Can I use Bcdedit on any version of Windows?
Yes, Bcdedit works on all versions of Windows that support UEFI firmware. Make sure your system meets these requirements before proceeding.
Is it safe to modify boot entries using Bcdedit?
While modifying boot entries with Bcdedit can be safe when done correctly, it’s crucial to follow instructions precisely. Backup your current settings before making changes as a precaution.
What should I do if my system doesn’t recognize Archcraft after setup?
If your system fails to recognize Archcraft, check the boot entry created by Bcdedit. Ensure that the path points accurately to where Archcraft is installed. You may also want to verify that your BIOS settings allow for dual-booting.
How can I uninstall or remove an existing Boot Entry for Archcraft?
You can easily remove an unwanted boot entry using bcedit commands in command prompt or PowerShell. Use `bcdedit /delete {identifier}`, replacing `{identifier}` with the actual identifier of the entry you wish to delete.
These FAQs cover some key areas regarding how to set up archcraft with bcdedit effectively while addressing potential concerns users might encounter along their journey toward a successful installation.